The #1 reason people tell me they don't make pie at home is that they're intimidated by making the crust. I often hear things like 'doesn't it take a skilled baker?' or 'isn't the pre-made stuff just as good?'. I am here to tell you that both of those things are far from true.
To move past this fear, the first step is to admit this is a totally rational feeling. You should never feel silly for being intimidated by something you haven't tried before. The second step is to know, understand and believe that it is actually easy. You may be thinking "of course she thinks it's easy because she cooks for a living and has done this a bunch." I thank you for giving me the benefit of the doubt, but in reality, it's just really not that hard. I will say, it's kind of messy, so be prepared for a bit of kitchen clean up. The end result is totally worth it, though. Making pie dough from scratch is about to become the easiest part of making pie and it's freakin' delicious. With that said, if you try this and mess up the first time, try it again. Don't give up on yourself (or pie!) that easily!
Now, let's begin. If you've done what I often do, and just scrolled through this post you're probably thinking that this looks like a heavy post, filled with lots of information, but don't let that deter you. It's information that is helpful to know in order to make your pie dough creating experience much better. It's kind of like checkers - once you learn a few basic moves, it's actually really simple.
Flour, Fat and Moisture
Pie dough is all about ratios and the only thing that is "hard" about it is understanding how flour, fat and moisture work together.
A brief note about flour: I use the same brand of flour (Bob's Red Mill) anytime I make pie crusts. This way, I know how it will react to my liquid. The important thing to remember here is brand doesn't really matter. Consistency does.
LIQUID TO FLOUR (GENERAL) RATIO
1/4 cup flour : 1 Tbsp liquid
This ratio is generalized, meaning you may end up using a little more or less liquid to flour depending on how dry your flour is or how humid the air in your kitchen is (wait don't leave - it's not really that complicated!). We'll ignore the chemistry behind this to simplify it - all you need to learn is how the dough should look (see graphics in the Visual Guide at the bottom of this post). Once you know that, you can tell if it needs more water or not. If you aren't confident on whether your dough is too dry, just remember it's always better to err on the side of too much liquid than too little, here. Any liquids you add to your dough should be ice cold.
FAT TO FLOUR RATIO
1/4 cup flour : 2 Tbsp Fat
In this instance, any 'solid' fat will work. You can use butter, shortening (even the vegan shortening), lard, or others like coconut or palm oil as the fat in your crust. (All of these really do work, just not all the same way. Once you've got the basics down, start experimenting!) I prefer butter - the fresher the better, because mmmm...fresh butter - but whichever you use just make sure that it is cold. Heat is also an enemy of flakey crust, until we bake, so be sure all of your ingredients stay cold while working your dough. If using shortening or lard, I suggest placing it in the freezer for 15 minutes before adding it to your crust. If using butter, keep the sticks in the freezer and cut them when ready to use. For blending the fat into the flour, you can use a food processor, pastry blender, two knives or even your hands. My hands are naturally hot and end up melting the butter too quickly, so I prefer a pastry blender over knives and a food processor over everything.
Alcohol or vinegar
Using a small amount of alcohol or vinegar in your pie crust will promote tenderness of the crust and guard against overworking the dough. They both inhibit our frenemy Gluten from forming when the water and flour combines. Gluten is great in bread, but not usually pastry - it causes shrinkage in the oven and can make the crust tough.
Temperature
As I mentioned earlier, until you're ready to bake, heat is the enemy of making good pie dough. In order to get that delicious flaky crust, the fat needs to stay in solid pieces while being worked into the dough. If it melts and breaks down too much, it will create a tough dough. Try to touch your dough as little as possible - this is why I prefer using a food processor over my hands to work in the fat. Ambient temperature can influence your dough, as well. If it's warmer than 72 degrees in your house, I suggest placing all of your ingredients and mixing bowl in the freezer for at least 15 minutes prior to use, this will help to keep your fat cold for longer as you work it.
Flavoring Pie Crust
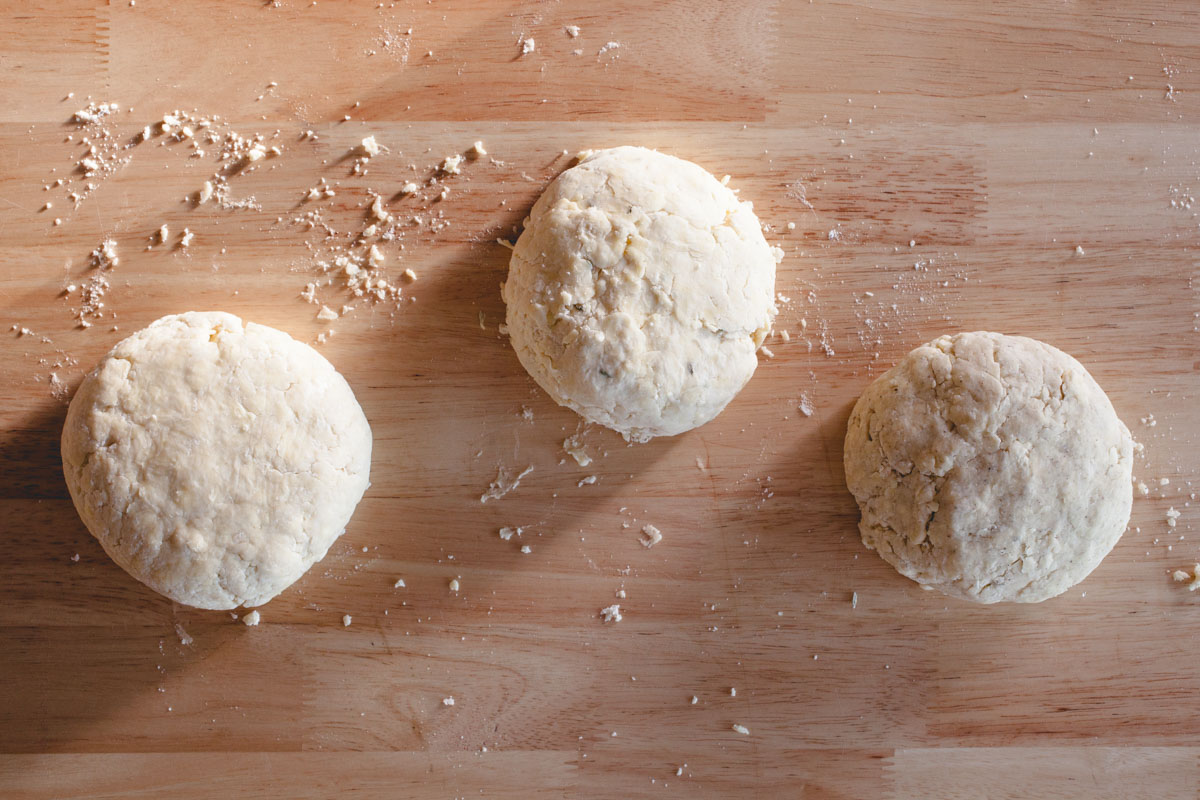
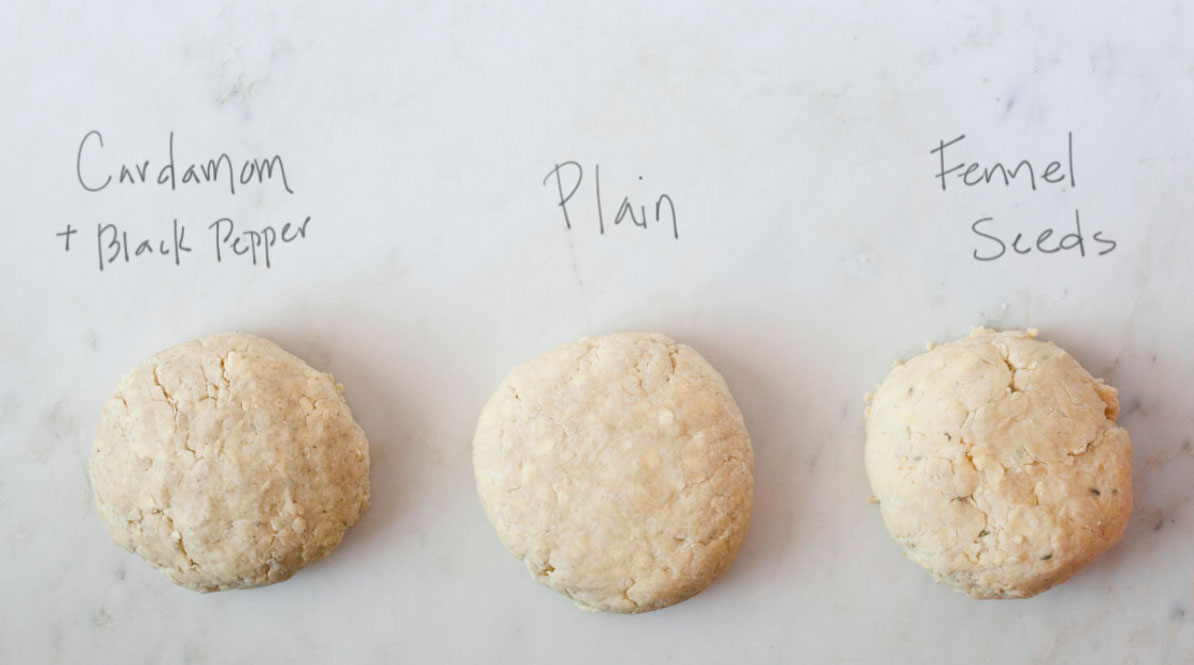
When mixing the flour, sugar and salt together, you can add in an array of spices and herbs to flavor your crust. This is a great way to add additional subtle flavor to your pies that compliments its filling, without competing with it.
A few suggestions, you ask? How do these sound:
Peach Pie with Cinnamon Crust
Apple Pie with Fennel Seed Crust
Cranberry Pie with Orange Zest and Ginger Crust
Key Lime Pie with Lime Zest Crust
Pot Pies with Sage Crust
Quiche with Rosemary Crust
Basic Pie Dough
This recipe makes dough for a single crust (double the recipe for a double-crust pie).
1½ cups all-purpose flour
½ cup (1 stick) unsalted butter, cubed and cold
1 tbsp granulated sugar (for savory crust, reduce to 1 tsp)
½ tsp kosher salt
Spices or minced herbs (optional)
6 to 8 tablespoons ice water
2 teaspoons cider vinegar
Place the flour, sugar, salt and any spices or herbs in the bowl of your food processor and pulse, just to combine them. Add in the chunks of butter and pulse about 4 times, or until the butter pieces are the size of almonds (This will vary on the size and power of your processor and the hardness of the butter.)
Dump the flour mixture into your mixing bowl and make a well in the middle of it. Stir together ice water and vinegar. Start by adding 5 tablespoons of water mixture to flour mixture. With a fork, begin fluffing the mixture together. Continue just until the water is mixed in (1), adding additional tablespoons of liquid if too many dry spots remain. (I find it helpful to rotate the bowl as I work.) The dough is ready when about a quarter of the flour is still slightly dry and crumbly, but the rest is shaggy and clumping together. To test, grab a small amount in your forefingers and pinch it together. If it cracks and falls apart, work in another tablespoon of water. If it sticks together and keeps form, you’re set. The dough will still be loose but don’t panic! That’s how you want it. If it doesn't look like this yet, continue adding your ice water, one tablespoon at a time, and work it in the same way with your fork.
Pour the dough onto a clean work surface. To begin, place your hands on either side of the dough and start pressing them toward the center. Repeat this move a few times to form the loose dough into a rough dome shape. Flip and fold as needed to incorporate the dry portions, but do not knead it like you would bread (1). Once the dough has formed into a singular mass, flatten your dome shape into a chubby disk (2). Wrap tightly in plastic wrap and refrigerate for at least 3 hours, or overnight if you can. You can leave the dough in the fridge for up to three days, which means you can get a jump on your pie prep. (If you want to prep your dough more than three days ahead keep it in the freezer and allow at least a day for it to thaw in the refrigerator.)
When you're ready to roll out the dough, allow the wrapped disk to sit out on your counter for a few minutes to warm up. Lightly flour your work surface and the top of your unwrapped dough disk. Starting in the middle of your disk and roll your pin upwards with medium pressure, all the way through the edge of the dough. Move the pin back to the middle and roll your pin towards you with the same technique. Rotate your dough a quarter turn and repeat. Continue until the dough is about 1/8" in thickness. (Rotating the dough as you roll it limits the amount it sticks to your surface. If you do end up with a stuck crust, a bench scraper is a very helpful tool for unsticking it. If you need to add more flour, just gently lift and sprinkle more where needed. If any major cracks appear as you roll, gently press them back together and continue rolling.)
When you've reached the right thickness, fold the dough in quarters and to transfer it to your pie pan. Unfold and gently fit the crust to form to the pan's shape. If you plan on crimping the edges, trim the excess to leave about an inch of overhang. Fold the excess under itself and crimp. You can also trim to the edge of the pie pan if leaving plain, adding cutouts, or putting on a top crust.
Footnotes: 1. Working the dough, either with a fork or kneading with your hands, will encourage gluten development which not pleasant in pie crust. Be as sparing as you can with mixing and kneading. // 2. It is normal to have some minor cracks in or around the edge of the dough disk. Parts of the dough will still be drier than others - this is where resting the dough in the refrigerator is crucial. As the dough rests, the flour will absorb liquid, allowing those cracks to be repaired or disappear when rolling it out.
Visual Reference For making dough
Use a folding motion when mixing your dough to help keep the crust tender. Rotating the bowl at the same time helps ensure even mixing. The dough will look shaggy when finished (right).
The Pinch Test: Take a small clump of dough in your hand and press. If your dough sticks and holds shape, you've added enough water.
Pie dough will look very different than bread or pizza dough. Small cracks in the surface are totally normal and acceptable. This is what helps develop a flaky texture and any cracks can be repaired when rolling it out.
If you are unsure of just how to roll out your crust, there's a super exciting video below showing you (really, the video is in real time because I find it helpful to learn by watching someone perform a technique I'm unfamiliar with).
For a single crust, fill your pan with your rolled crust, fold over or trim any excess and crimp the edges.
For a double crust, fill your pan as you would for a single crust, but trim or leave the excess without crimping. Fill the pie and roll out your second (top) crust and cut or decorate how ever you desire. Pinterest is a great resource pie design inspiration!


